Tiny Microgreens Are Packed With Nutrients
Microgreens Have Up to 40 Times More Vital Nutrients Than Mature Plants
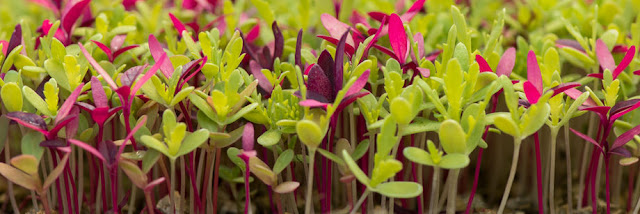
They may be tiny, but studies shows trendy microgreens punch well above their weight when it comes to nutrition.
Researchers found microgreens like red cabbage, cilantro, and radish contain up to 40 times higher levels of vital nutrients than their mature counterparts.
Microgreens are young seedlings of edible vegetables and herbs harvested less than 14 days after germination. They are usually about 1-3 inches long and come in a rainbow of colors, which has made them popular in recent years as garnishes with chefs.
Microgreens have three basic parts: a central stem, cotyledon leaf or leaves, and typically the first pair of very young true leaves. They vary in size depending upon the specific variety grown, with the typical size being 1 to 1.5 in (25 to 38 mm) in total length. When the green grows beyond this size, it should no longer be considered a microgreen and these larger sizes have been called petite greens.
Microgreens are typically 2–4 weeks old from germination to harvest.
Because microgreens are harvested right after germination, all the nutrients they need to grow are there. If they are harvested at the right time they are very concentrated with nutrients, and the flavor and texture is also good.
There is a huge variety of microgreens available, ranging from different kinds of vegetables to even some types of herbs. Some of the most popular types of microgreens include:
Arugula
Chives
Mizuna
Chard
Cabbage
Beets
Cilantro
Mint
Garden Cress
Sunflower
Kale
Parsley
Dill
Orach
Carrots
Celery
Basil
Chia
Mustard Greens
Fennel
Amaranth
Radish
Watercress
Growing microgreens is relatively easy; many small "backyard" growers have sprung up selling their greens at farmers' markets or to restaurants. A shallow plastic container with drainage holes, such as a nursery flat or prepackaged-salad box, will facilitate sprouting and grow out on a small scale. They are quick and easy to grow indoors on a sunny windowsill and are a great project for kids.
If you’re ready to get started, here are some simple steps on how to grow your very own microgreens:
- If you’re growing indoors, you should start by spreading about an inch of potting soil in a shallow tray. For outdoor use, designate and clear out a small section of your garden.
- Next, distribute microgreen seeds evenly over soil. Keep in mind that since these plants will be harvested before reaching maturity, you can place them closer together than you would if you were growing them to their full size.
- Cover seeds with soil and use a spray bottle to mist the top of the soil with water.
- If growing indoors, place your shallow tray by a window with natural light or underneath a grow light. You can also use a warming mat to speed up plant growth, but it’s not necessary.
- Mist soil with clean water a few times daily to help plants germinate and stay hydrated.
- Once microgreens have reached one to three inches tall, they can be harvested by cutting greens above soil line. This is usually between seven to 14 days after germination, though it can vary based on the type of plant.
- When you’re ready to plant another batch, either remove roots or simply dump the tray entirely and restart with fresh soil.
#microgreens #nutrition
Health Benefits Of Microgreens
 Reviewed by CREATIVE WRITER
on
November 19, 2018
Rating:
 Reviewed by CREATIVE WRITER
on
November 19, 2018
Rating:


.JPG)


I agree with a lot of the points you made in this article. If you are looking for the Microgreens Hyderabad, then visit Zeptogreens. I appreciate the work you have put into this and hope you continue writing on this subject.
ReplyDeleteA coaching leader must be conscious that coaching entails investing time on each individual, and on the whole team. check more info
ReplyDeleteMedicare plans offer peace of mind Amherst Insurance Agents
ReplyDelete